Cinematic lighting is an essential aspect of filmmaking that can significantly impact the visual storytelling and overall mood of a scene. Mastering various lighting techniques can elevate your cinematography skills and create visually captivating and professional-looking images, regardless of your budget or equipment. In this blog post, we will discuss several lighting techniques and provide tips for creating a visually stunning film.
Three-Point Lighting
Three-point lighting is a fundamental technique that forms the basis for most cinematic lighting setups. This technique consists of three primary light sources: the key light, fill light, and back light. The key light serves as the primary source of illumination, casting light onto the subject from one side. The fill light is placed on the opposite side, softening shadows and providing a more balanced lighting. Finally, the back light is positioned behind the subject, creating a rim of light that separates them from the background and adds depth to the scene. Experimenting with the intensity and placement of these three lights can help you achieve a wide range of lighting styles and moods.
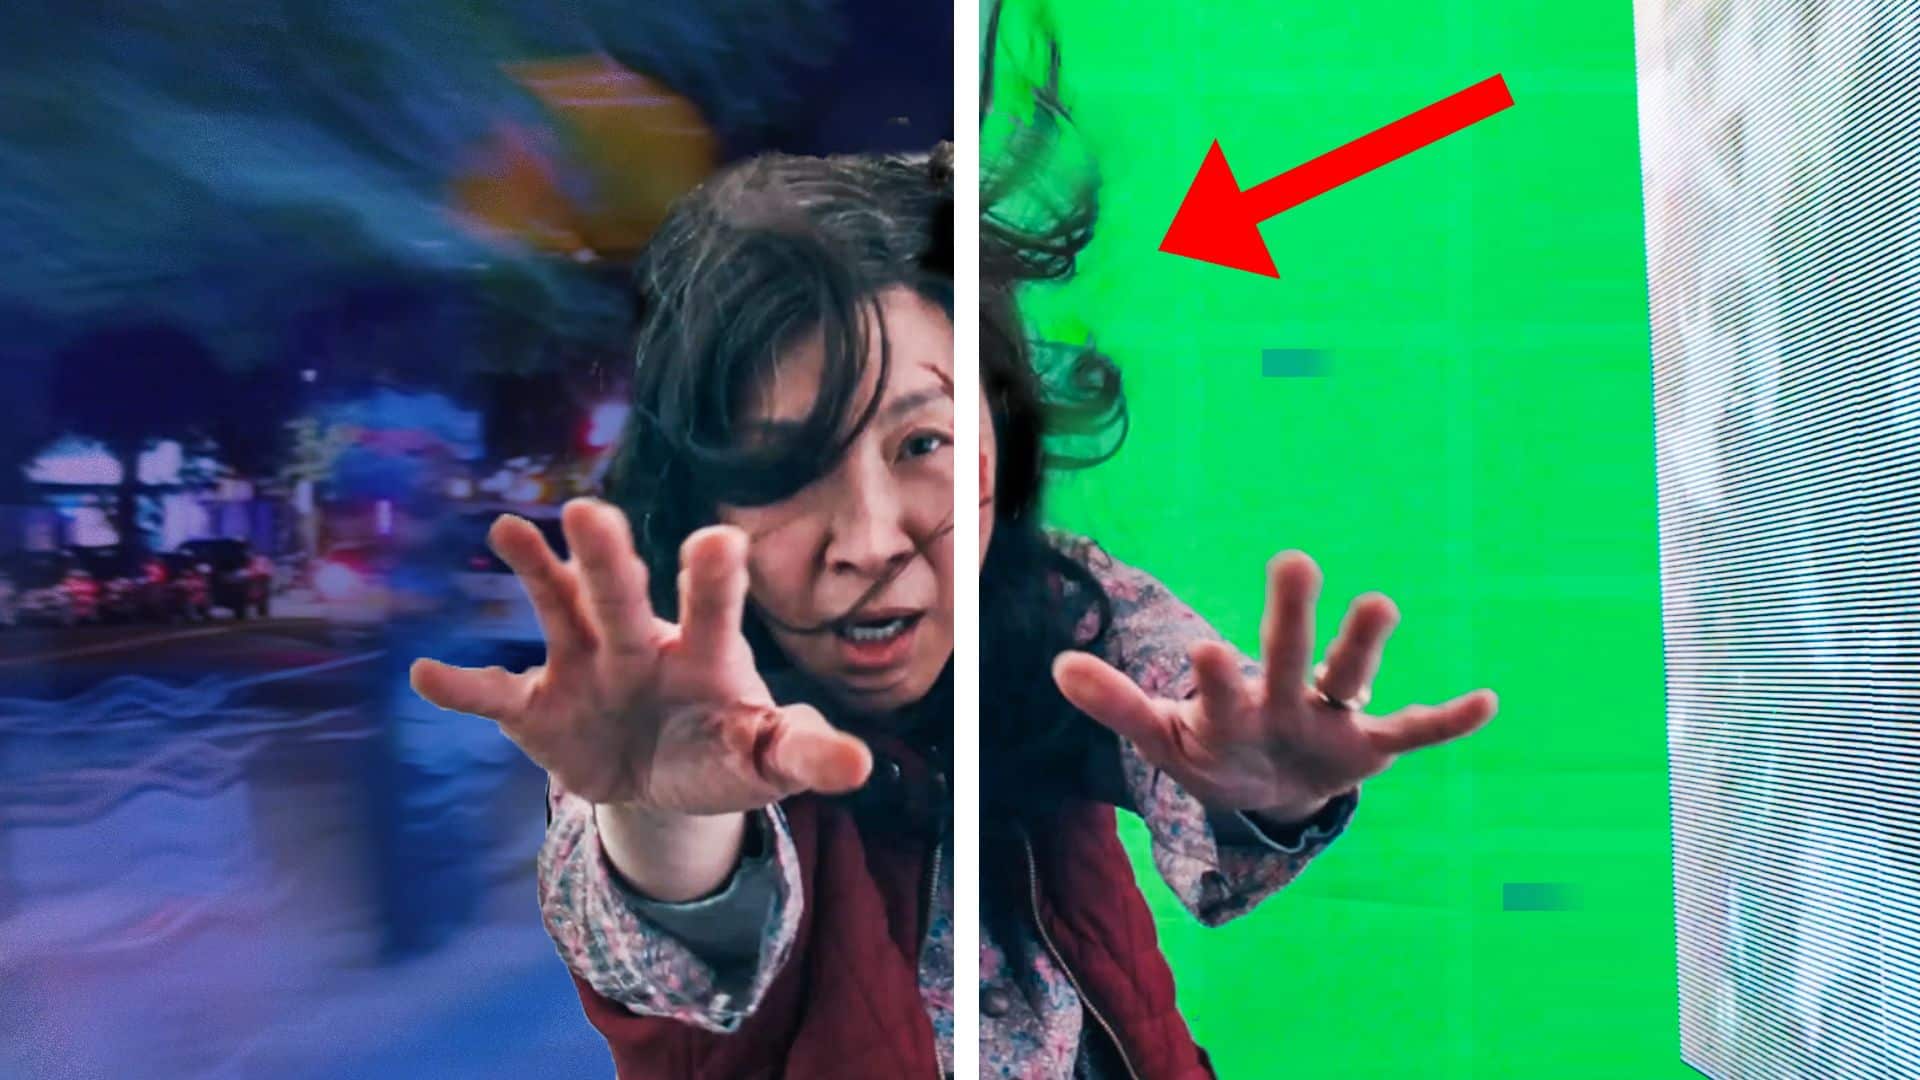
Green Screen Lighting

Green screen lighting is a technique often used in post-production to seamlessly integrate live-action footage with digital backgrounds or visual effects. The key to successful green screen lighting is to evenly light the green backdrop, avoiding shadows and hotspots. This ensures a clean and easy keying process in post-production, allowing you to create convincing composite images. When working with green screens, it’s essential to pay close attention to lighting consistency, as well as the separation between the subject and the backdrop, to prevent unwanted color spill.
High-Key and Low-Key Lighting
High-key and low-key lighting are two contrasting styles that can significantly impact the mood and atmosphere of a scene. High-key lighting features bright, evenly lit scenes with minimal shadows and low contrast. This style is often used in comedies, musicals, and light-hearted dramas, creating a cheerful and optimistic atmosphere.
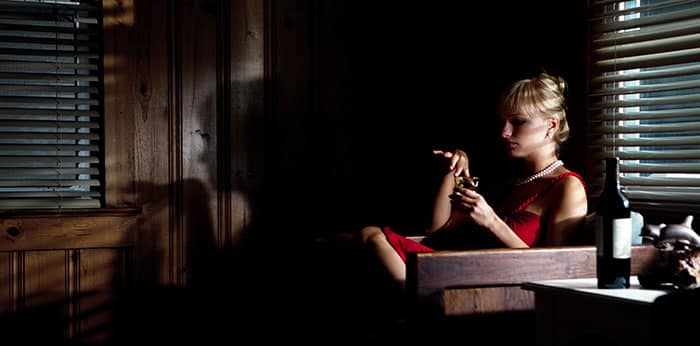
Low-key lighting, on the other hand, creates darker, more shadowy scenes with high contrast. This style is typically used in suspense, horror, and film noir genres, evoking a sense of mystery, tension, and unease. By adjusting the intensity and placement of your lights, you can experiment with both high-key and low-key lighting styles to create the desired mood for your scene.

Low-Key Lighting it's all about shadow
Shooting Night Exteriors
Capturing visually stunning night exteriors poses unique challenges and opportunities for cinematographers. In this section, we will discuss some essential considerations and techniques for shooting night exterior scenes.
Moonlight and Large Overhead Sources
Moonlight is often used as a primary source of illumination in night exteriors, casting a soft, cool light on the scene. This natural light source can be simulated using large overhead lighting setups or lighting balloons to create a consistent and atmospheric look. By carefully controlling the intensity and placement of these lights, you can create a realistic and visually appealing nighttime scene.
Day-for-Night Technique
Day-for-night is a technique where scenes are shot during the day and manipulated in post-production to appear as if they were filmed at night. This approach can help you save on lighting equipment and allows for more control over the final look of the scene. By carefully adjusting the exposure, color balance, and contrast in post-production, you can create a convincing nighttime scene even if it was shot during daylight hours.
Overlighting and Base Layer of Exposure
When shooting night exteriors, it’s essential to capture enough visual information in-camera to maintain flexibility in post-production. This often involves “overlighting” the scene,
creating a brighter image than what you intend for the final look. By establishing a base layer of exposure, you ensure that important details are captured and can be adjusted later during editing. This approach is particularly crucial when filming characters, as it helps prevent underexposed close-ups that can’t be easily fixed in post-production.
Remember, increasing your camera’s ISO to achieve a brighter image can introduce noise or grain, potentially degrading the image quality. It’s always better to capture more visual information on set and make adjustments in post-production, rather than relying on the camera’s low-light capabilities alone.
Practical Lighting
Practical lighting refers to the use of light sources visible within the frame, such as lamps, candles, or streetlights. These light sources can not only add depth and realism to a scene but also contribute to the overall mood and atmosphere. When working with practical lights, it’s crucial to balance their intensity with the other light sources in the scene to achieve a cohesive and natural look. Consider using dimmers, gels, or diffusion materials to control the output of your practical lights and integrate them seamlessly into your overall lighting design.
Motivated Lighting
Motivated lighting is a technique where the light sources used in a scene are motivated by real-world sources, such as sunlight streaming through a window or a car’s headlights. This approach can create a more natural and believable look while still allowing you to shape the light to achieve your desired visual style. When using motivated lighting, consider the direction, quality, and color of the light, as well as how it interacts with the characters and environment in the scene.
Using Color in Lighting
Color can play a significant role in establishing the mood and atmosphere of a scene, as well as in conveying the visual style of your film. By carefully choosing the color temperature and gels for your lights, you can create a wide range of looks, from warm and inviting to cool and eerie. Experiment with different color combinations and pay attention to how they impact the overall mood and emotion of your scene.
Final Thoughts on Cinematic Lighting
Cinematic lighting is a critical component of filmmaking, and mastering various techniques can help you create visually stunning and professional-looking images. By understanding and experimenting with different lighting approaches, such as three-point lighting, high-key and low-key lighting, and motivated lighting, you can enhance the visual storytelling and mood of your film.
Remember, a well-lit scene shot with a modest camera will almost always outshine a poorly-lit scene captured with high-end equipment. With practice and creativity, you can develop your unique relationship with light and achieve the cinematic look you envision, even on a limited budget. Embrace the learning process, make mistakes, and adapt as you explore the endless possibilities of cinematic lighting.
